The intuitive mind is a sacred gift and the rational mind is a faithful servant. We have created a society that honours the servant and has forgotten the gift. Albert Einstein
Category Archives: The Camera
Methods of developing your photographic eye through knowing your camera.
When you get the sense that there is an image you want to make take your time, do a 360 of your chosen subject, take photographs like an artist who might make multiple sketches of a scene. This is in the tradition of Andre Cartier Bresson, who would return to a place where he knew there was an image taking roll after roll of film. Then looking at the contract prints once the film was developed, he would finally circle the one, the image that captured what attracted his attention in the first place. The one that captured the emotional experience of the scene.
A few days ago in the forest, I saw something out of the corner of my eyes between the trees. I turned and headed for the spot and began taking images, you can see from the images on my contact sheet below that it took some time to work out how to create an image that capture what I had seen. I began with the roots which seemed so unusual but that did not work either compositionally or as an expression of what I had seen. Somewhere past the middle of making images I finally felt confident I got the image I wanted but I still kept moving around and composing new images. I kept going because I knew given the light and the setting if I returned it might not be the same, and I would not be sure about the image I had felt would work until I saw it full screen in Lightroom.
For me, there are “Four Joys” in photography: image creation, image processing, printing and public display. I do understand that there are some photographers who pride themselves in attempting to combine the image creation and processing in the camera, and shy away from processing. There is a lot to be said for this method. I prefer to get it right in camera and then explore the process of working with the image in post-processing software, of which there is a lot. The following is a discussion of the movement away from using the camera as a recording instrument toward a more creative use of the camera.
The evolving world of digital photography.
Sometimes a painter can be complemented by suggesting it is just like a photograph, and a photographer can be complemented sometimes by saying it is just like a painting.
I think this is an interesting observation. Initially, photography was used to record objects and people. Ironically lots of sales went to painters who used the photographs as a basis for a painting. The Pictorialists decided to break into the Art market by defocusing their images some using vaseline on the lens to make them more like fine art (now we use Lens Babies). But they did indeed move photography into the Fine Art Market. Then Ansel Adams went in the opposite direction with the f64 group. He decided to make things hyper-real, as we all know his film stock and darkroom manipulations were legendary. I suppose in today’s world he would have been extensively photoshopped his images. After that lots more happened but these two examples illustrate the extremes that occurred in analogue photography in an effort to make photography marketable in the art world. Photographs continue, ever since Alfred Stieglitz, to operate both as a means of recording and an art process. So, the question of whether or not a photograph should be painterly surely must be answered by what world the photograph is going to inhabit.
Winter, Fifth Avenue, photogravure by Alfred Stieglitz, 1892; published in Camera Work, No. 12, October 1905.
If you are in the photojournalist world you can get fired if you do anything to an image unless, of course, you belong to Magnum then the editors can not touch you.
If you are a portrait artist there is a lot more leeway and especially if you are Annie Liebowitz both to manipulate clients and the photographic process, but usually, some realism is demanded by your clients.
Annie Leibovitz
Digital photography unlike analogue photographs allows for much more manipulation than ever before and its printed form is completely different. Analogue photography was dependent on film stocks, papers, and darkroom manipulation. Digital on the other hand can use similar methods as some planographic techniques such as lithography and etchings; using cotton paper and pigment inks. This of course is only one of many ways of printing digitally. Then there is the translation into the computer full of all kinds of possibilities. This massive world of possibilities that is now available to both digital artists and photographers is just beginning to be explored. A great example of this might be a friend of mine who embedded a mysterious image of a woman in a mirror that only faintly appears when someone is close enough to trigger the proximity sensor. The Artist Diana Nicholette Jeon whose highly manipulated images are composed solely on “I” devices before being printed, mounted and glazed with encaustics.
Another interesting example is Instagram artist Marth Haversham whose collages mix foliage and flowers with cut-out body parts from magazines and newspapers, creating an illusion that only works when presented in 2D photographic format.
In today’s photographic art world you have to create either enormous (often created by stitching), highly manipulated or mixed media images to get into art galleries these days. While more traditional photography is now often relegated to the museum circuit. Schools or movements in photography are, like all artistic practices, a dialectic between creative people experimenting within the new frontiers that are emerging. If we are playing in that world what is acceptable or not acceptable is dependent on whether or not we are advancing that dialogue. That means I think pushing the boundaries of the new frontier, not being afraid to misstep, and occasionally running full speed into a dead end.
We took a walk around Amphitrite Point by the Ucluelet lighthouse in the evening, it was near sunset, and the volcanic rock and wind sweep vegetation was very inviting. I spent some time looking for framing along the path, and I settled on a few spots. As the light was fading quickly, I brought the camera to my eye to check the dynamic range. A camera can record around 12 to 14 stops of light, depending on the camera. This is close to what the eye sees, but the brain, as I scan the scene, adjusts to 20 or more stops of light and creates an impression based on the 20 stops, not the 12-14. So I know my impression of the scene will be very different from what the eye saw in one instant after another and what the camera will record or the mind has constructed.
Framing the Image
Fortunately, the light is fairly even. I check the exposure for the sky and the dark areas of rock in the foreground, and there is a one to two-stop difference. As I am using a digital camera, I know the highlights once over-exposed can never be recovered, and the shadows, on the other hand, can. So I set the exposure for the sky—so no need to use bracket exposure techniques to capture the dynamic range. The images below were one of the framing ideas I had decided on earlier. I only had time for the three exposures you see below.
The first image has the horizon line in the upper third of the image, the second has it more centred, and the third is somewhere in between. I often place the horizon line in the lower third of the image and then take one with it in the upper third of the image, but it is a clear night with no clouds in the sky, so in this case, I did not bother to place it on the lower third.
Dealing with Time and Physical Limitations
The other consideration was the line of rock that leads to the tree, and I would have liked to have made a few more images playing with where the tree was located in the image, by moving up and down the path, or forward and backward. The path being small and the opening in the trees limited, and time is short, I chose not to bushwhack, so I did not explore these options. Also, altering the size of the pool of water in the scene might have been interesting. I would have had to find my way closer to the pool and to the right. The other consideration was how much of the ocean to include, which could have been altered by moving up or down the hill I was on. If the light had not been failing and I had arrived earlier, all this would have been more possible. This does say something about the importance of checking sunset times and arriving early to scout the location.
Downloading the Images and Preparing the Camera for the Next Day
Once back in my lodgings, I downloaded the images to an iPad and began looking through them in Lightroom. While doing this, I recharged my battery and returned my camera’s settings to my preferred neutral position. Often as the light is failing, I have to increase my ISO, so I make sure this is back to the camera’s native ISO. I usually attempt a few panoramas, so I also make sure my focus setting is not still in manual focus. Once everything had been downloaded and uploaded to the cloud, I reformated the SD card in the camera using the backup battery. I then set the camera down beside the charger to remind myself to repack the camera and the newly charged battery, now the backup battery, in the bag for the next day.
Processing the Image
Looking through the images I have taken, I find one I feel would be the most interesting and begin adjusting it using a personally customized preset. The preset makes some automatic adjustments to the RAW image. In other words, it applies what a camera’s JPG engine would normally do to an image if I were shooting JPG rather than RAW, but the way I would want it adjusted. I do this to save time as I have some preferred settings that are somewhat repetitive. I do have several custom presets that I use, depending on the nature of the light in the photograph or the subjects in the photograph.
Image with preferred preset settings applied to image.
Once the preset is applied, I consider my crop, check horizon lines, and do a quick check for sensor dust. There is a two-stop difference between the highlights and shadows, and I know if I crop out a lot of highlights or shadows, it will alter the exposure. So when I am making the next set of global adjustments to the image, I want to start with the correct exposure. This is why I want to consider the crop first before processing the image any further. The image below is the crop I chose.
Image after the crop and horizon line is checked but before applying adjustments specific to the image.
In the photograph below, I have made some adjustments to make it more accurately reflex how I remember the scene feeling at the time; the coolness in the sky and rays of sunlight hitting just the tops of the rocks; the darkness creeping into the rocks in the shadows, and stillness of the pond reflecting the darkening sky.
Image after specific adjustments made
Other Possibilities
The image still has some very diverse light on certain parts of the rock; other photographers at this point might consider moving the image into photoshop, where they can isolate specific areas of the image and bring the tonal values more closely together. This strategy could lighten the darker areas or bring up the highlights in the ocean to emphasize the light reflecting off it. Others might look at lightening the tree to make it more dominant. In other words, Photoshop could open up other ways of making the photograph reflect how different photographers might remember the scene.
Same Scene Different Results
My idea of how the scene should look might be very different from other photographers. I have often made an image in the same spot as other photographers, and when I look at their images, I am always surprised at how different they saw things. I think this has a great deal to with how we see, that as our eyes move around adjusting to different light and examining specific details of interest. Our mind is busy putting all that information together to create a memory of the place, a memory different for every individual depending on what detail they focused on and how their eyes moved about the scene.
Examples of How Others Might be Processed
Lightroom has many more adjustments that another photographer or I could have used to create a very different impression of the scene, and some external editors can be integrated into Lightroom. So to illustrate some other ways of processing, I have made a few alterations to the image. The first being the simple addition of a frame.
Adding a Custom Frame
The image below is an example of reducing the tonal differences in the image, which creates a softer, more even feel to the light.
Further Adjustments in Software Integrated into Lightroom
Perhaps pushed a bit too far, the image below is an example of colour grading and temperature adjustments to the photograph. There is also a reduction of the green channel, making the green plants in the immediate foreground less dominant.
The image below is an example of a photographer going in the opposite direction and desaturating the whole image. A lot of photographers prefer less saturated images and instead use contrast or clarity to enhance the image.
In this image, a much lower colour saturation has been selected.
The two images below are black and white photographs, and those photographers who love to work in black and white, know that the colour channels, like the colour filters you used to place over the camera lens when you were shooting film, can effectively do the same thing in post processing. This gives these kinds of enthusiasts a vast degree of options for altering the tonal value of the image, as you can see from these two images.
Creating a Black and White
Photographers Choice
When they are at their best, photographs seem almost three-dimensional, but it is not an accurate reflection of reality. It is an illusion the image is flat; after all, you can not reach into it; you can only scan it with your eyes. All photographs are either manipulated in the camera by an algorithm that creates a JPG or altered in post-processed using the RAW file, as I have shown above. The photographer must choose that best conveys their reaction or feeling of their experience of the place through their photograph. Ansel Adams’s statement that he “does not take photographs he makes them” speaks to the manipulation that goes on both in framing the shot and then in the darkroom. So a photograph, as Garry Winogrand put it, is an illusion and not really made by the camera; it is made “…with the eye, heart and head. ” So how a photograph is processed, whether it be a modified JPG engine in the camera or the post-processing of a RAW file, it is the photographer’s choice. Roland Barthes points out, and rightly so, that “photographs possess an evidential force,” which I believe gets in the way of enjoying how people express themselves through their photographs. One should never ask did you alter the photograph, as the answer is always yes, even if no post-processing occurred.
There are four joys in creating any art, such as digital images are the processes of image creation, processing, printing, and public display. Each stage of the artistic process is as pleasurable as the next, but the joy of moving through all four stages is greater than the sum of each. As you cycle through them, the next stage tells you about the previous one and provides ideas about approaching your next image. Each stage is filled with creativity and discovery. If one primarily posts on the internet, the last two stages are different from a gallery display but still an important way to experience the four joys.
Image Creation
The image creation process is one of learning to see and developing your photographic eye. This process involves traditional tools, which I have covered in a previous post, Composition and Framing. I also use a walking practice to bring photography into a regular part of my life, like going to the gym or yoga. In the walking practice, I use exercises to find ways of being more aware of my intuitive self, a doorway into developing a photographic eye. In other words adding my camera to a routine exercise walk, where intuition is used to find compositions. In this way, my awareness of the compositional potential of my surroundings increases.
Image Processing
The second joy of photography is processing an image to potentially communicate to others the intensity of the emotional reaction I experience that brought me to bring the camera to my eye and make an image. It is an intensely personal way of expressing through an image your experience of the world around you. The images below are a simple example of this process.
The image below is the RAW image directly from the camera.
RAW unprocessed image
This next image is the process of colour and exposure correction to create an image that can be used more effectively to express the moment’s experience.
Processed using Lightroom
The corrected image is then further processed to return the intensity of the light and coolness of the shadows. More accurately, expressing the sense and feel of the moment that drew me to react to the scene and bring the camera to my eye.
Final Image
Printing
If I were to print the final image, it would be at a much higher resolution than what appears on the screen, and the colour gamut would differ as well as its appearance. A computer scene typically is 72 dots per inch, whereas a photographic print is 300 dots per inch. There is also a big difference between how an image looks when it is backlit on a computer screen with Red, Green and Blue pixels and what the same image looks like on a very white Hot Press Bright paper after many pigment colours have been applied. Seeing the print come out of a printer and physically holding it in your hands is a wonderful tactile experience, and often like seeing the image anew; or more accurately, in a different light and different medium. Often this process will force me to rethink my method of processing. If this is the case, I may make another print with different adjustments.
Public Display
Taking an image and framing it behind museum glass, printing it on aluminum using a dye sublimation process, or placing the image in a lightbox transforms the image. There is a formality in this process, and as it is lifted to your living room wall, your local coffee shop or a formal gallery, it takes on a new look and feel. People react to the image through this process, and you get feedback that you will apply to your next image-making process. This ritual is not just feedback but also a celebration and a sharing with others. I often find other artists then plays with my ideas using their unique methods and style; this artistic dialectic often opens up new ideas for me.
Have you wandered the halls of your high school looking up at the composite photographs on the wall? In each frame, the class of that year looks down at you, and you might notice the similarity of everyone’s hair and clothing style. Then when you get to the most current year, you begin to see how different everyone looks. This says something about how difficult it is to see one’s style in the present, but as a photographer continues to make images, it becomes more discernable. The type of photography they choose to pursue, whether portraiture, journalism, fashion, event, sports, still life or landscape, will influence their style. The type of photography they practice is only a small part of what eventually defines a person’s style.
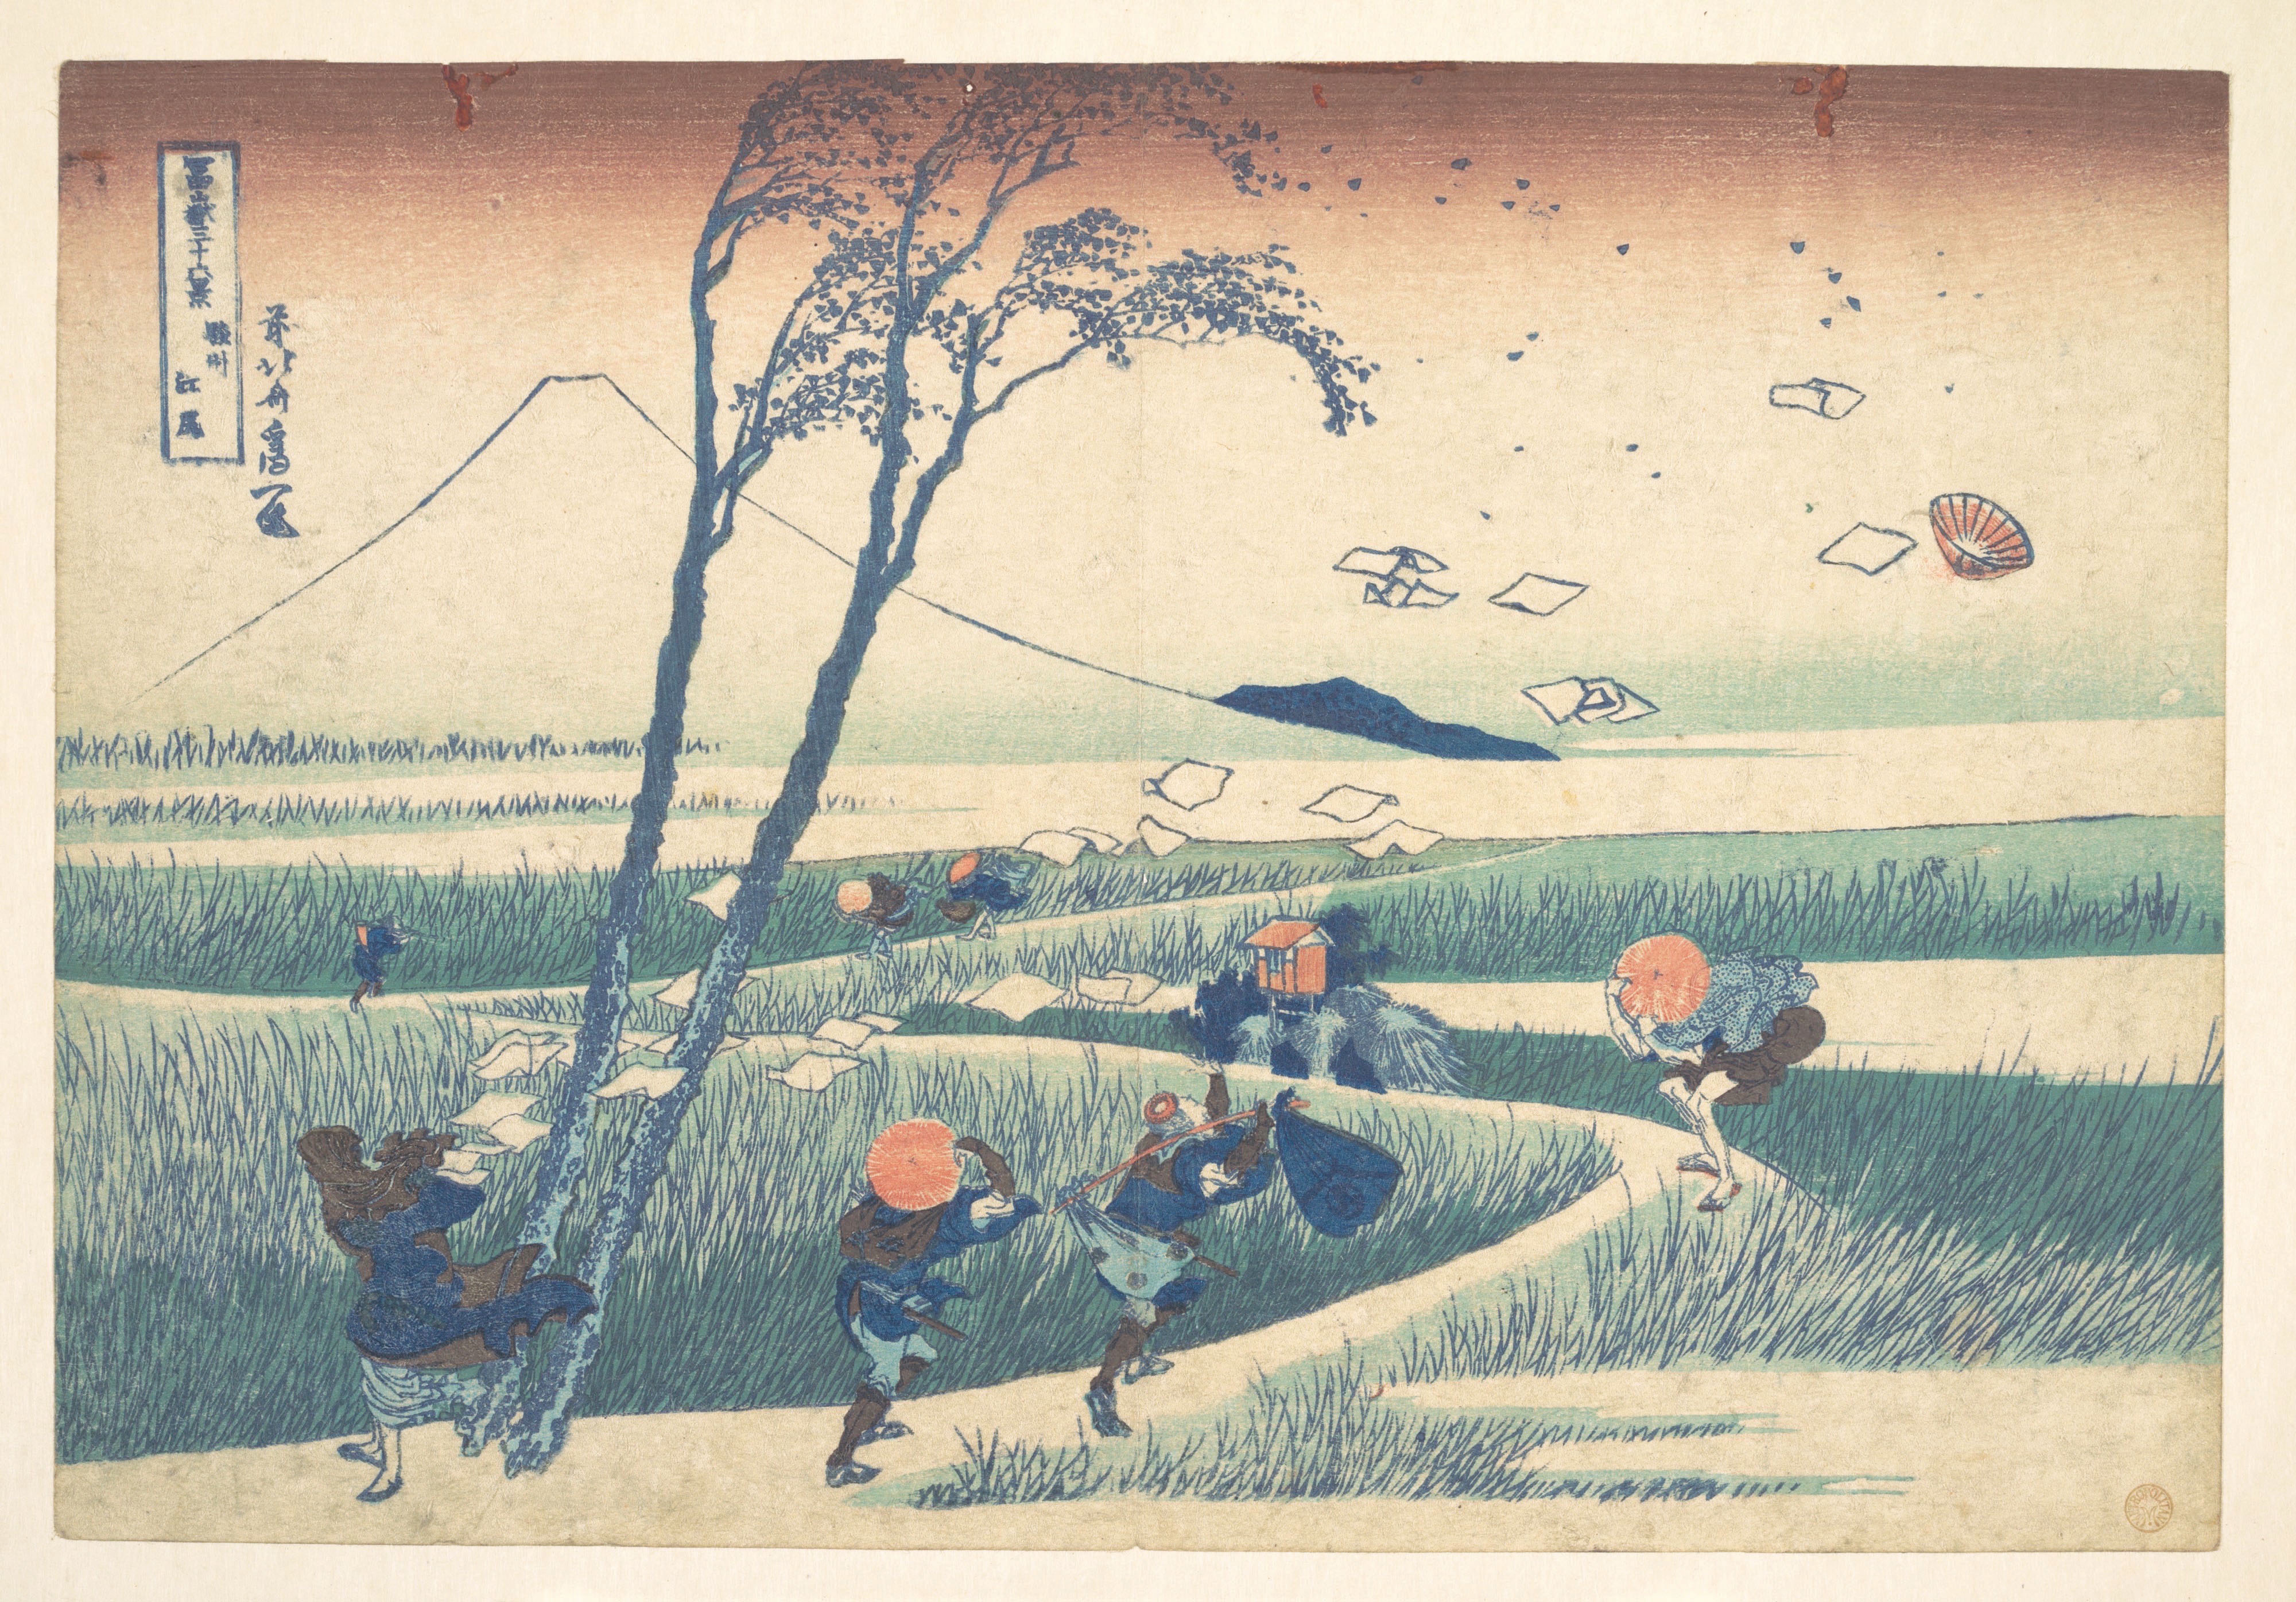
Style is a very ambiguous word. Its definition involves mannerism, appearance, distinctiveness, design and form. However, when leafing through a book of a photographer’s work, you see a style after a while. You may not be able to define it or describe it, but you can see it. Just how does this style evolve? If you study art or photography history, you will see photographers fall under the influence of other photographers, painters, printmakers, etc. They are also influenced by the artists surrounding them, whether they be filmmakers, dancers, musicians or poets. All of this influences what they choose to place within their frame. In the example below, you can see clearly the influence of a Japanese print on Jeff Wall’s famous image.
A Sudden Gust of Wind (after Hokusai) Jeff WallKatsushika Hokusai – Suruga Ejiri (Eijiri in Suruga Province), from Fugaku sanjurokkei (Thirty-six Views of Mount Fuji), Japan, 1831. Polychrome woodblock print, ink and colour on paper, 25.4 × 37.1 cm, The Metropolitan Museum of Art, New York
In addition to this, how they choose to process and print their images influences how they make photographs. Often the printing and presentation process helps in the development of their style. This is why I think it is important if you want to really enjoy making photographs and develop your own personal style, you need to go through the whole process: creating the image in-camera, processing the image on your computer, printing the image, and framing and mounting the picture in a show. Even if the only thing you do is produce a calendar with the images or place one in a frame on your living room wall, each stage of the process informs and develops your style.
Aspects of Style
A photographers style is affect by and is constantly evolving:
What is included in the frame and what is not included.
How the components in the frame are in or out of focus, the distance from the camera, the angle of the camera, what is lit by the lighting
The use of colour
The use of light
The capturing of movement or lack of movement
The inclusion of emotions or the evoking of emotions
The use of lenses
The density of content or lack of density
The use of rhythm, harmony, proportion, contrast, balance, and implied depth
Two Examples of Style
Goga Bayat Cinematic
Goga Bayat is an Iranian filmmaker and photographer whose personal style is perhaps in the cinematic style and has a distinct look and feel. Cinematic Street Photography is a street shot that looks like a frame from a movie. It’s a combination of letterbox crop, mood, aesthetic, colours and more that make the shot appear like a MOVIE STILL. Some of the cinematic hallmarks are a prime lens to focus on the subject and diffuse background, careful emphasis through lighting, and colour grading.
Gary Winogrand
Gary Winogrand, on the other hand, has a very different style. However, you can clearly see the influences of Robert Frank and others, and he has a style that both has similarities and greater differences. Robert Frank had a more geographical focus as he creates images in cities and small towns. To some degree, it was a record of what was disappearing, whereas Winnogrand’s images focused on the emerging culture of the times. The style goes beyond this element as there are many moments in his photographs, and some often suggest that he metaphorically captures the dance of life.
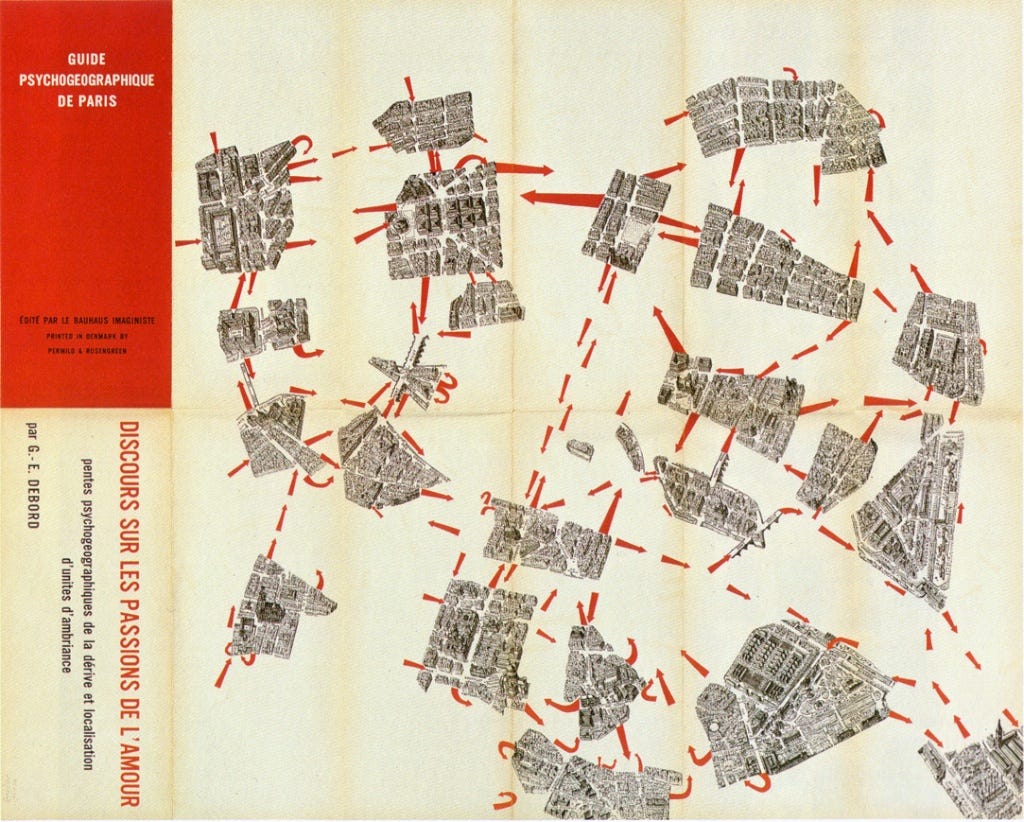
In 1956 Guy Debord put forward the “Theory of Dérive,” which he defined as an experimental mode of behaviour linked to the behaviour of urban society. It was a technique in which the individual in an unplanned journey through a landscape, often urban, and “let themselves be drawn by the attractions of the terrain and the encounters they find there.” The goal of a Dérive is to study the psychogeographical terrain of the landscape, leading to the potential creation of “Situations.”
Situations were to result in liberation from the pervasive alienation of modern life. In other words, it allowed the individual to experience their surroundings without being the impact of the psychological commercial veneer that often obscures our reality. Although the concepts were developed for political purposes, they were widely used in the art world. It also broadened the use of Flâneuring that artists had adapted like Virginia Woolf at the turn of the last century. It leads to interdisciplinary art events and “art happenings” around 1959, the forerunner of performance art. Performance art in the 1970s emerged in Vancouver, making photography and video arts key to making a record of these interdisciplinary performances done by one or a small number of people.
Funeral Procession for the Birks Building
The Birks Building Funeral is an example of performance art at this time. It was a collaboration between the group of Architectural and Fine Arts Students, among many others. It began with a funeral procession lead by Evelyn Roth’s Video creatures and followed by caskets carried by architecture students with black tears on their cheeks; it began at the Vancouver Art Gallery at Georgia and Thurlow. As the police escorted the group up Georgia Street, the funeral band played a sombre dirge.
When the group reached the building, which was now under demolition, Reverend Jake Kent began his officiating; as the wreaths were laid at the building, the band played. The video creatures began putting hexes on the new buildings across the building street. Angus McIntyre recorded the performance.
When you look at the experience of Martha Cooper, who turned down corporate work to follow street art and graffiti in a Dérive fashion, these Dérives lead to situationism where she became part of the street performances and artwork she was photographing. It became a lifelong passion that had a large influence on city cultures around the world.
The following is a trailer for a movie that tracks her history through her career, and how she followed her instincts which lead to her unusual career.
She like many other artist and photographers have used either consciously or unconsciously this method to make photographs, to develop their style and create shows. This is exactly how Fred Herzog created his canon of work, which like Cooper, allowed him to develop a unique style of photography.
Personally, the process is important, as it allows me to merge into my surroundings with the camera and leads me towards a subject matter I might not have considered or understood without this process. This process allows the interplay between an instinctive part of my mind to react to my psychogeographical surroundings and leads me toward new ideas and acts of creation.
Vivian Maier is a US photographer who worked as a nanny for 40 years and pursued photography in her spare time. In her lifetime she was unknown and unpublished. Here prints, prints and films were auctioned off shortly before her death and a large amount of them were purchased by John Maloof who now owns 90% of her work. Unable to locate the photographer before her death Maloof set about exploring her work the quickly became an international sensation. Artist and photography critic has compared her work to that of Robert Frank, Diane Arbus and Helen Levitt.
Baudelaire’s Idea and Virginia Woolf’s Creative Method
Charles Baudelaire first put forward the idea of a flâneur, someone who silently wandered the city, observing, but this term has been redefined in our modern era to take on a more artist sense. Virginia Woolf discovered this method of walking around lead her to great creativity, she had the idea for “To the Lighthouse” one afternoon while walking in Tavistock Square. In a letter to Ethel Smyth in 1930, she wrote: “I cannot get my sense of unity and coherency and all that makes me wish to write the Lighthouse etc. unless I am perpetually stimulated.” This comes from engaging with the world, from “plung[ing] into London, between tea and dinner, and walk[ing] and walk[ing], reviving my fires, in the city, in some wretched slum, where I peep in at the doors of public houses.” ( A tribute to female flâneurs: the women who reclaimed our city streets, The Guardian)
Street Photography and the Modern Day Flâneur
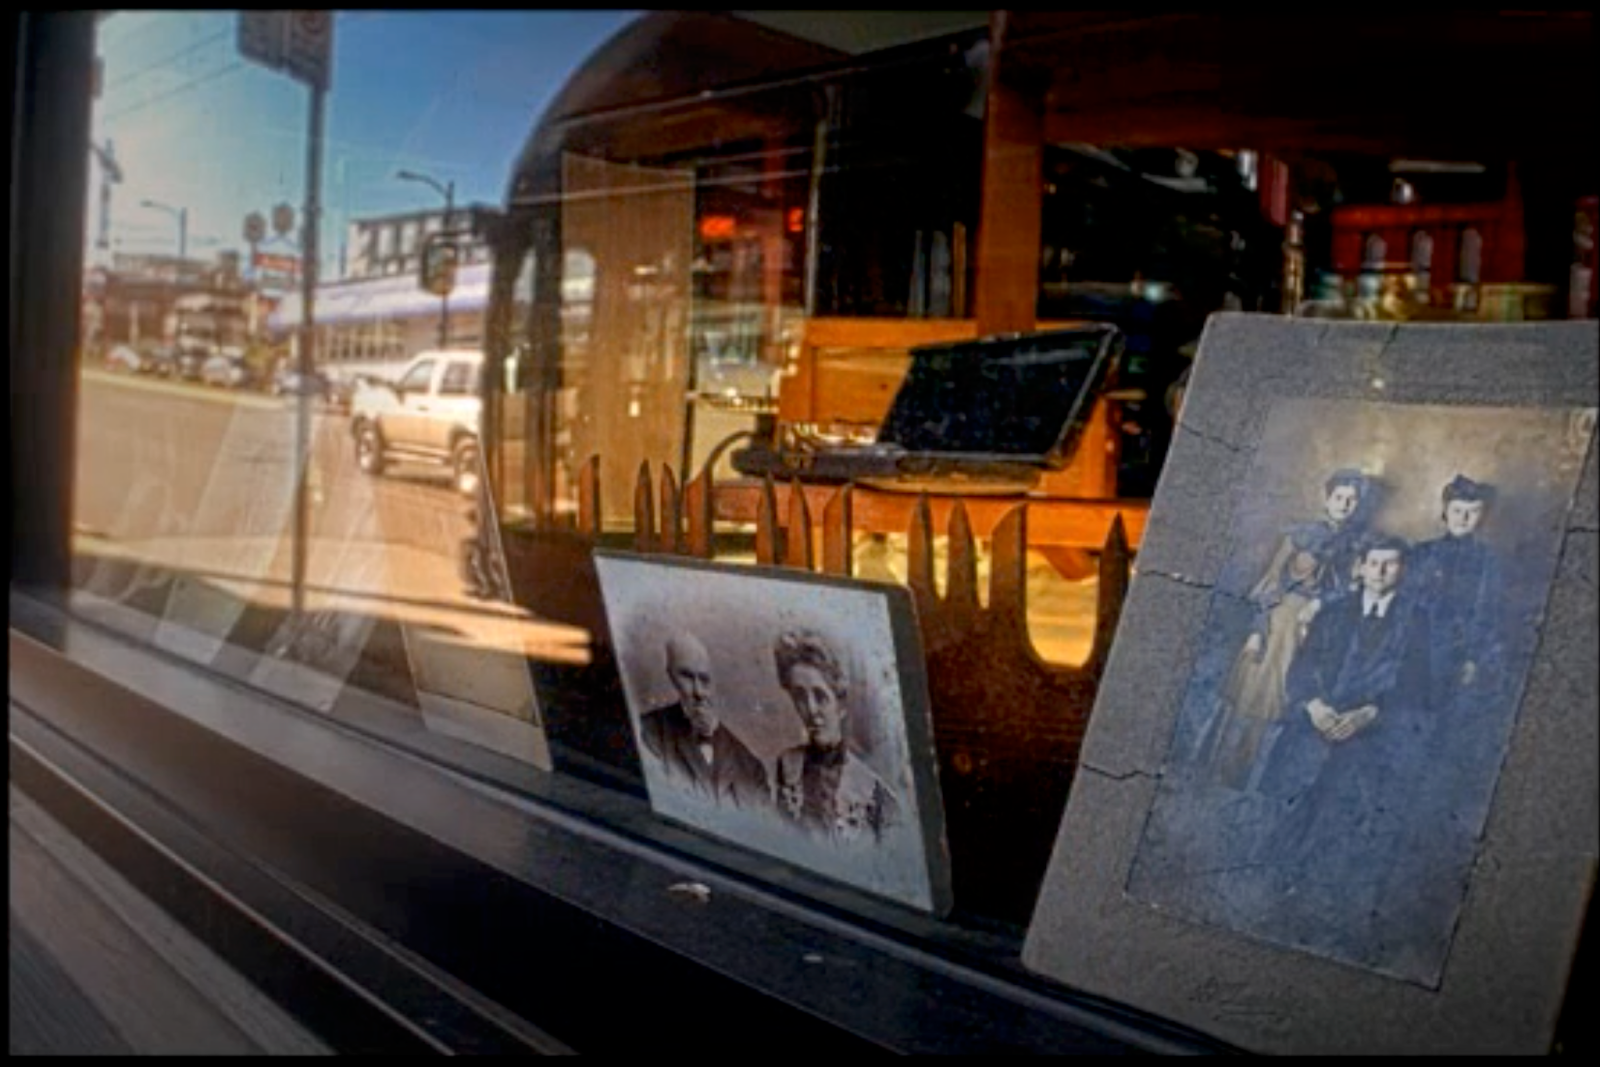
In modern times, we might call a flâneur a loner or an artist and the methods of many street photographers resemble those of a flâneur. Vivian Maier is a good example of such a photographer. She was a very private person who took more than 100,000 pictures in her lifetime, it is clear very few ever saw them while she was alive. Born in New York in 1926 she then travelled to live with her mother in the French Alps but in 1951 see returned to Chicago where she took a job as a nanny. She roamed the city with a Rolleiflex camera photographic whatever stuck her interest people, situations, scapes, and events all were recorded in her camera. Her archive was bought as a chance purchase at an auction and through the efforts of the new owner, her images have become recognized as among the best street photography of the 20th century.
September 1954, Vivian MaierNew York, New York, Vivian MaierAugust 1975, Vivian MaierJune 1953, New York, New York, Vivian MaierPoint Grey Lookout, Canada, Vivian Maier
A digital photograph is a two-dimensional representation of a “representation of presence,” as Roland Barthes suggests in “Camera Lucida.” It is a result of an optical and electrical process that creates a bit map that is first revealed on a backlit computer screen. This initial process of rendering the image is handled by a fixed algorithm written first by the engineers that created the camera and second by the engineers who wrote the software for the post-processing software. In other words, the image is not therefore an accurate representation of a place, person or event it has been manipulated extensively as it travelled from the camera into the computer or iPhone screen. Every camera and post-processing software will create a different result some with subtle differences and others with significant differences. What is most important to an artist is that the image truly captures the experience of being present when they were drawn into framing the scene with their camera. When one uses a photograph to create an artistic representation of one’s presence it is important how this image is rendered, and in many cases what the camera and viewing software initially produce is not an accurate reflection of the experience.
Barthes suggests that a photograph in Latin would be expressed as imago (image revealed), lucis (extracted), opera (mounted) and expressa (expressed). I think this is a useful taxonomy, of the four stages involved in photography if not all art forms. First the capturing of this image, second the rendering of the image, third the presentation of the image and finally the venue in which it is viewed. During all four stages, consideration has to be given to how the image will be finally expressed.
These stages or process applies to most artistic processes, take for example the paintings of E. J. Hughes, a contemporary of Emily Carr and the group of Seven. You can see from the process he follows that he begins with capturing and framing the scene which is done by eye, and a pencil sketch. In the pencil sketch, he records the shapes and colours of the scene before him. However the colours he notes relate to the palette he will use when rendering the image, rather than the actual colours he is seeing. So he is already in the process of translating the colours into the media he is going to use to render the image.
Mt. Cheam and the Fraser River, 1958 mural study pencil by EJ Hughes.
You can see from the paint how he renders the colours and shapes into the finished painting to recreate a record of his presence in this scene into its final presentation. In photographic terms, he has sharpened the shadows, contrasted the colour tones, altered the pallette to remove conflicting colours and altered the dynamic range of the image.
The second sketch is more complex recording a lot more information about how to translate the colours and details in the scene.
Eagle Pass at Revelstoke,(1958) Pencil Sketch Study for painting by EJ Hughes
Again he takes the information from the sketch and renders the image into its final presentation.
1961, Oil Painting by EJ Hughes
In photography you would start at the same point that Hughes did by finding and framing an image but instead of sketching it, and making a notation of the colours, the digital camera records a facsimile of the scene with an RGB representation of the colours. The resulting photograph is the photographer’s sketch. A photographer may also take numerous captures, in a different light. Like Hughes, once the photographer has returned to his studio and opened the sketch in post-processing software the process of trying to reconcile the photographic sketch with their experience begins.
The following chart illustrates the limitations of a camera’s ability to record colour in RGB, the three colours it uses to create all colours, and how it differs from what the eye sees. As you can see from the diagram the range of colours in RGB is not what the eye is seeing. So like Hughes and his oil pigment paints, the photograph has to consider the palette available in order to render the scene as they had experienced it. In addition to this problem, the photographer also has to consider presentation, when the image is printed it will be in CMYK, which has a wider but different range of colours.
The RAW RGB photograph now has to be rendered in post-processing software. This can be a simple process or highly complex depending on the photographer. The two images below illustrate the simple rendering of an image. The image was captured during a warm spring afternoon with the sun streaming through various areas of the park. What drew me to the image was the light and the contrast between the large trees and the people in the park.
In the RAW image you can see the algorithm struggle unsuccessfully with the dynamic range of the images causing the trees to go far to dark and the light and colour in the scene was muted.
Canopy (RAW), Edward Peck, sassamatt.com
The rendered image below is a much more accurate rendering of the scene I experience. In order to do this I had to correct the highlights to bring back the blueness of the sky seen through the trees canopy, that had been lost. Also the shadows needed to be adjusted to bring back the textures in the trunks tree trunks. A simple adjustment to the whites brought back the light falling in the scene beyond the trees. In addition to these adjustments the colours had been muted or dulled down by the camera’s software, so colour had to brought back as well balanced. The effect of this was to restore the relationship between the trees in the foreground with the individuals in the middle ground that had been lost. Finally the framing was altered as the camera has a fixed aspect ratio that needed to be adjusted.
Canopy (Rendered), Edward Peck, sassamatt.com
These are very simple adjustments, perhaps not as great as some photographers might make and certainly not a great as Hughes made to the paintings above. A good illustration of a more dynamically rendered image is Jim Friesen’s Pitt River I. Here the photographer has rendered the image to bring out the dynamic nature of the clouds and there reflect that drew him to capture this image. He has achieved this by reducing the impact of the colours in the forest and foreground foliage and enhancing the refections.
Jim was kind enough to share the capture he began with (below) and tells me this is the out of camera shot with just some basic processing applied to it. You can see the experience it expresses is quite different.
So like Hughes the sketching and rendering process are both important to artists like him and photographers whose artistry is to bring back the sense of presence that was felt in the scene they were capturing.
References:
Barthes, Roland. (1981) Camera Lucida: Reflections on Photography (translated by Richard Howard) Hill and Wang: New York.
Amos, Robert. (2019) E. J. Hughes: Paints British Columbia. Touchwood: Victoria, BC.
This week lets try some evening or night long exposures into which we introduce some artificial light. The image below is one example of using a long exposure to capture a room lit by night light from the exterior, and light from the interior is introduced to create a ghost-like image.
How I Exposed My Sample Image
To create this image, I opened the curtains of the room, introducing a little bit of night light into the room. I place the camera on a bookshelf (a tripod would be best, but anything firm will do), the camera indicated a one-minute exposure would work. I set the camera to one minute. I put the camera timer on so that when I depressed the shutter button, there would be time for the camera to be perfectly still when the shutter went off. When the shutter opened, I momentarily turned a lamp in the room on and stepped into the shot. I held a pose for the count of five, then stepped out of the shot and turned the lamp off. I did this several times until I was happy with how long to stand with the lamp on and the positioning of everything in the frame. Make sure you do a lot of experimenting with your capture to explore the possibilities thoroughly.
My method is just one of many ways of approaching this challenge. For example, instead of a lamp, you could use flashlights or other sources of light. You could introduce candles into the image to see what that source of light might do during a long exposure. Don’t be afraid to experiment even if it goes wrong; mistakes often lead to unique and creative images. This challenge should be a lot of fun. If you feel like setting up outside this works as well.
In Roland Barthes “Camera Lucida” he deconstructs the word photograph in Latin suggesting it would be translated “imago lucis opera expressa;” “which is to say: image revealed, extracted, mounted, expressed… by the action of light.” In other words, the process of photography does not stop after the shutter has closed, once it is revealed either as a negative or a positive in a computer the photographer is engaged in how to extract the image. How will it be developed? Which image from a session best captures what the photographer wants to express? Does the image trigger an idea that suggests a new session or does it suggest a new direction of expression?
Once an image is selected then the extraction process begins, here again at any point in the process of developing the image a photographer may circle back or change directions. Once an image is finally developed, then the process of mounting or creating the presentation format for the image begins. What medium should be used to print the image? What sort of framing process will best express what the photograph is communicating? Then finally where will the image be expressed? Is it to be part of a series? The same process goes on I believe whether or not it is expressed virtually or in a formal gallery setting.
In the case of Sally Mann, this process is very tactile and in her archives, both the finished negatives and the discarded negatives are kept. So you can physically see the process through which she has travelled to arrive at a final piece. But with everyone, the process is different, in the case of Albert Watson some of this process may be internalized. However, like Henri Cartier-Bresson, the decisive moment is not about a single capture but more about spending a great deal of time capturing different images in the same place or around the same idea until the decisive moment emerges.